10 Easy DIY Nail Art Ideas You Can Try at Home
A fresh manicure doesn’t have to mean an expensive salon visit or hours spent in a nail chair. With a few basic tools, a little patience, and a touch of creativity, you can create stylish, professional-looking nail art right at home. DIY nail art is not only budget-friendly, but it also gives you full control over colors, designs, and finishes—perfect for expressing your personal style.
Whether you prefer minimal designs, playful accents, or subtle sparkle, there’s a look here you can master even as a beginner. If you’re craving even more inspiration beyond these ideas, explore collections of nail inspiration and trends to spark your next at-home manicure.
Below are ten easy DIY nail art ideas, complete with supplies, step-by-step guidance, and simple variations so you can customize each look.
Table of Contents
1. Classic Polka Dots
Polka dots are one of the easiest nail art designs to master, making them ideal for beginners. They’re playful, timeless, and endlessly customizable.
Supplies:
- Base color polish
- Contrasting polish
- Dotting tool (or a bobby pin or toothpick)
- Top coat
Steps:
Start by applying two thin coats of your base color and allow it to dry completely. Dip your dotting tool into the contrasting polish and gently press it onto the nail to form dots. Space them evenly or scatter them randomly for a fun effect. Once dry, seal everything with a glossy top coat.
Tips & Variations:
Try mixing different dot sizes for a modern twist, or use metallic dots over a neutral base for a chic look. A negative-space base (clear nail with dots only) also feels fresh and trendy.
2. Minimalist Negative Space Designs

Negative space nail art uses your natural nail as part of the design, creating a clean, modern aesthetic that looks effortlessly chic.
Supplies:
- Sheer or nude polish
- Striping tape
- Contrasting polish
- Clear top coat
Steps:
Apply a sheer base coat and let it dry. Place striping tape on your nail in simple shapes—lines, diagonals, or half-moons. Paint over the tape with your accent color, then carefully remove the tape while the polish is still slightly tacky. Finish with a top coat.
Tips & Variations:
Keep shapes simple for the best results. Neutral tones with black, white, or metallic accents are especially striking.
3. Easy Gradient Ombre
Ombre nails look complex, but they’re surprisingly easy to achieve with a makeup sponge.
Supplies:
- Two or three complementary polish colors
- Makeup sponge
- Liquid latex or tape (for cleanup)
- Top coat
Steps:
Paint your nails with the lightest color as a base. Once dry, paint stripes of your chosen colors onto the sponge and dab gently onto the nail. Repeat until the gradient looks smooth. Clean up the edges and finish with a thick top coat to blend everything together.
Variations:
Soft pastels work beautifully for spring, while bold or neon shades are perfect for summer. For edgier inspiration, explore bold nail ideas that mix color and pattern.
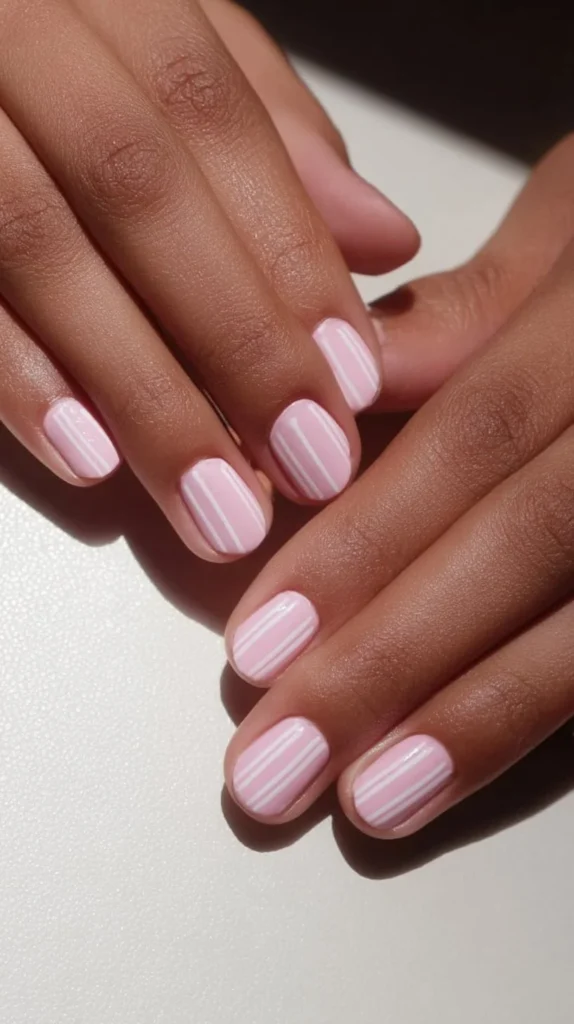
4. Quick Stripe Designs
Striped nail art is sleek, modern, and incredibly versatile.
Supplies:
- Base color polish
- Accent color polish
- Striping brush or thin nail art brush
- Top coat
Steps:
Apply your base color and let it dry fully. Using the striping brush, paint thin lines across the nail—vertical, horizontal, or diagonal. Finish with a glossy top coat.
Tips:
Metallic stripes over dark shades look especially polished. For beginners, fewer stripes create a cleaner result.
5. Glitter Accent Nails
If you love sparkle but want to keep things simple, glitter accent nails are the perfect choice.
Supplies:
- Base color polish
- Glitter polish or loose glitter
- Top coat
Steps:
Paint all nails with your base color. Choose one or two nails per hand as accents and apply glitter while the polish is tacky. Seal generously with top coat.
Tips:
Use a sponge to dab on glitter for maximum sparkle with minimal polish buildup.
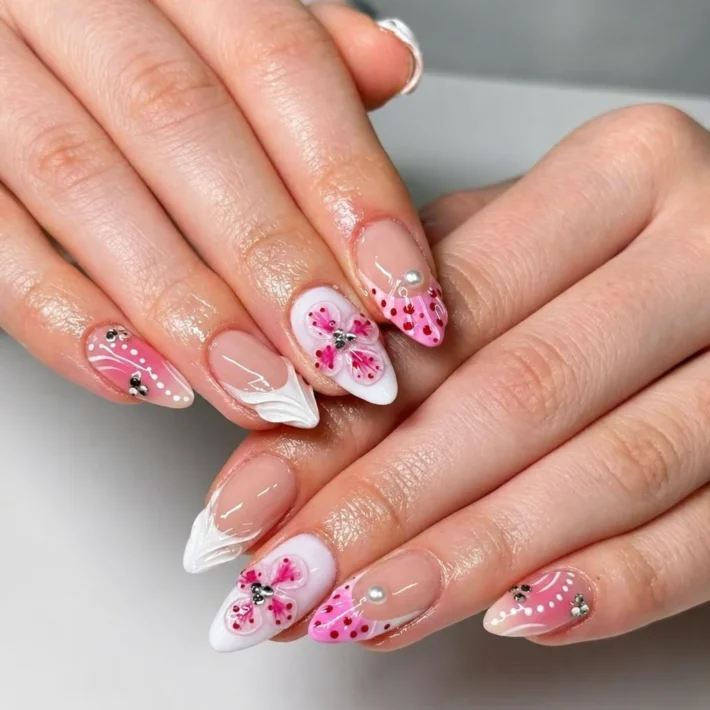
6. Floral Doodles

Floral nail art doesn’t have to be complicated. Simple flowers can be created with dots and small strokes.
Supplies:
- Dotting tool
- Thin nail art brush
- Two or three polish colors
- Top coat
Steps:
Use the dotting tool to place small dots in a circle for petals. Add a contrasting dot in the center. Use a thin brush to add tiny stems or leaves if desired. Seal with top coat.
Style Tip:
Florals pair beautifully with soft neutrals or pastel bases. Mixing seasonal colors keeps the look current and fresh.
7. Waterless Marbled Manicure
This mess-free marble technique delivers a high-end look without water bowls or complicated steps.
Supplies:
- Base color polish
- Two accent colors
- Cling film or plastic wrap
- Top coat
Steps:
Paint your base color and let it dry. On a palette, drop small amounts of accent colors close together. Scrunch the cling film and dab it lightly into the polish, then press onto the nail. Finish with a glossy top coat.
Tip:
Glossy top coats enhance the marble effect and add depth.
8. Tiny Gems and Studs
A few well-placed embellishments can instantly elevate your manicure.
Supplies:
- Rhinestones or studs
- Tweezers
- Nail glue or strong top coat
Steps:
While your polish is slightly tacky, place gems using tweezers. Press gently and secure with nail glue or an extra layer of top coat.
Variations:
Keep it subtle by placing gems near the cuticle or just one accent nail per hand.
9. Two-Tone French Tips

This modern twist on the classic French manicure is easy and stylish.
Supplies:
- Two coordinating polishes
- Fine brush or tip guides
- Top coat
Steps:
Paint your base color and allow it to dry. Add a contrasting color to the tips instead of traditional white. Seal with top coat.
Style Tip:
Try muted tones for an everyday look or bold contrasts for special occasions.
10. Hand-Painted Minimal Art
Small, simple designs can look incredibly refined when done thoughtfully.
Supplies:
- Thin art brush
- Neutral base polish
- Accent colors
- Top coat
Steps:
Over a neutral base, paint tiny shapes such as hearts, stars, dots, or abstract lines. Keep designs small and spaced out for a high-end finish.
Practice Tip:
Test your designs on a nail wheel or plastic surface before applying them to your nails.
Quick Nail Art Maintenance Tips
- Always finish with a quality top coat to extend wear.
- Allow each layer to dry fully to prevent smudging.
- Prep nails properly by pushing back cuticles and lightly buffing the surface.
- Reapply top coat every two to three days for longer-lasting designs.
Conclusion
DIY nail art is a fun, creative way to upgrade your manicure without spending a fortune. These ten easy nail art ideas prove that you don’t need advanced skills or expensive tools to achieve salon-worthy results at home. With a little practice and patience, your at-home manis can look just as polished as professional ones.
If you enjoyed these designs, explore more easy nail designs for beginners or dive into step-by-step trend guides you can try this season. Most importantly, have fun experimenting—your nails are the perfect canvas.